
ColorMunki Printer Calibration Experience
Disclaimer: I use a low-end, three-color Canon MP760 to print my work, mostly to do proofs before outsourcing prints at a professional lab.
Was calibrating a printer with the ColorMunki an easy experience? As a beginner, no. It took over three hours and I encountered a lot of errors. There are many reasons, but first I’ll describe the process.
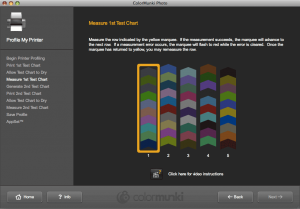
The ColorMunki software generates a test chart with five test strips that you print on the paper you wish to calibrate to. After waiting 10 minutes for the prints to dry, you slide the ColorMunki across each strip. If it fails to scan, the strip is highlighted in red on the screen and you scan again. After you finish the first chart, you print off a second chart with new colors and repeat the process. When you finish, you save the results as an ICC printer profile. Mac users can also use ColorMunki’s AppSet to configure your Adobe and Quark applications to print with this profile. If all goes well, this should take about half an hour.
 |
 |
|
| The yellow highlight shows you which test strip you’re supposed to scan. It glows red if the scan fails. |
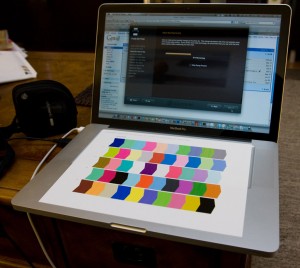
Waiting for the test chart to dry |
As I said, it took me over three hours to calibrate my printer. So, where did things go wrong? There are many steps in the process and unfortunately, you usually don’t discover you’ve made a mistake until the very end.
My biggest error ocurred while printing the test charts. For the ColorMunki prints to be accurate, you have to disable any color corrections in the printer driver. Unfortunately, the ColorMunki software and documentation don’t show you how. You also have to disable the printer driver color corrections each time you print a new test chart. The bottom line is that the instructions need to be better. I also had trouble scanning in my first test chart and the software wasn’t helpful in suggesting things I might be doing wrong. I finally figured out I wasn’t starting the ColorMunki on the right color patch. My last problem was using the printer profile. Although the Mac AppSet software configured Adobe Creative Suite to use the printer profile, it never worked with Photoshop CS4.
It took a lot of experimentation to figure out was wrong, including tons of wasted test images, test charts, reinstalled printer drivers, and reboots. Someone that is used to managing printer profiles would probably breeze through the calibration, but first-timers should be ready to exercise some patience.
The ColorMunki’s printer calibration wasn’t perfect — in particular, flesh tones seem a little redder. However, one of the great features of the ColorMunki software is that you can continue to refine a printer profile by generating test charts from your own images. If you print more frequently than I do, the time spent refining your profiles will pay off in prints that look good on the first try. Another great feature of printer profiles is that you can use them in Photoshop to preview your photo before you print it. You can see areas of the image where your printer can’t match what you see on the monitor (out of gamut).
next page – Beyond Calibration >>
Leave a Reply