
Track a photograph’s exact location with the new JOBO photoGPS
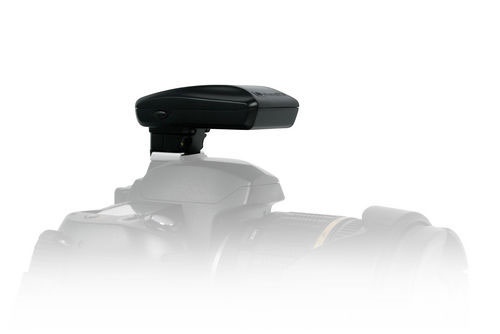
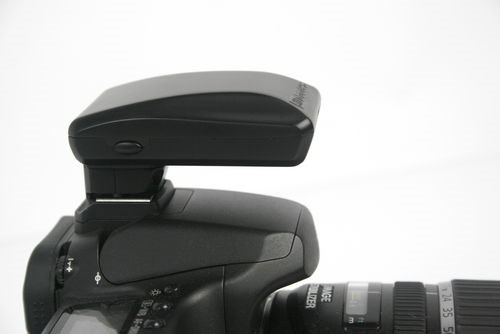
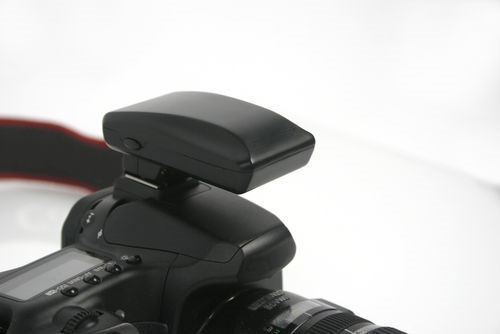
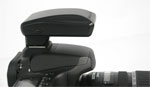 JOBO AG announced its new lightweight and easy-to-use Global Positioning System (GPS) unit, the JOBO photoGPS. The photoGPS fits directly on any digital camera’s hot shoe, like a regular flash unit, so there is no need for extra cables.
The photo GPS allows automatic geo-tagging by capturing raw GPS data and time which enables new and more efficient ways to search, visualize, organize, and share photo collections.
How does it work? When a photographer takes a picture with the photoGPS attached to the camera’s hot shoe, the photoGPS automatically captures raw GPS data and stores it to its internal memory. When the photographer goes to upload their photos, the JOBO photoGPS software will transfer the companion raw GPS data information. Matching times and locations is quick and easy, since the photos and raw GPS data were captured simultaneously.
The JOBO photoGPS will be available for Windows operating systems in October 2008 and Mac OS versions will be available by the end of 2008 for $159.
Related Content:
All JOBO User Reviews
JOBO Web Site
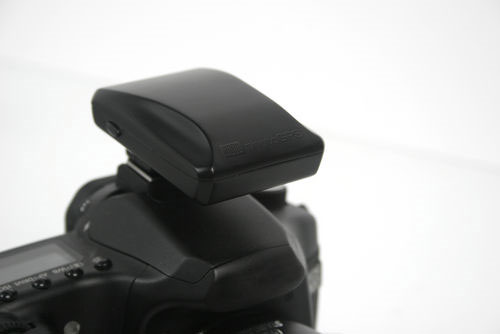
The Jobo photoGPS is a small, black plastic-coated GPS device which clips to a standard hot shoe of most cameras and logs the position of the device when the camera shutter is pressed. This data can be reconcilled with the images, later at your computer.
The box
=======
The unit arrives in a sturdy cardboard box 140mm x 140mm x 50mm and weighs in at under 300 grms when packed. Flicking open the front 50mm face reveals a Quick Start user guide v1.4 and the main unit itself, safely pushed into a square slot and nestling on a false floor. Opening that floor finds the USB cable and a CD containing a more extensive User Manual in .pdf format and Windows and Mac versions of the software, all in German, English and French. This is a well packed and robust start to your aquaintance.
The documentation
=================
The English version followed the German Quick Start instructions in the square, 20 sided guide in 3 languages. The translation seemed natural (no clumsy constructions) and apart from two niggles, was adequate for a Quck Start. Although covered later in the guide (after you’ll have eagerly started to follow the earlier notes), there is no hint up front about when to connect the device to the USB port of your computer. Reference is also made to section 6 of the Quick Start guide for how to edit the photo location information but this isn’t covered at all in version 1.4. Section 6 in fact contains Contact and Service information.
The transformation of the Quck Start guide and the full manual into .pdf documents is fine as far as it goes, but it does not take advantage of the full feature of the medium. For instance, the index page doesn’t make use of hyperlinks to allow you to jump quickly to the relevant section. This is so little effort to undertake, it makes you wonder if the package as a whole has been trialled by anyone outside the development team.
Installation
============
For those who take computer security seriously, the installation will be irritating but it does work. Both the Windows photoGPS (v 1.0.90.0) and the iTag packages have invalid digital certificates. Worse, on starting iTag, the build had expired and users are directed to the itagsoftware web site to obtain a latest version. The photoGPS installer then downloads a 27.6Mbyte file to complete the installation. There seems to be no “Check for updates” inside the photoGPS application itself. This seems like rather a waste of a distribution CD, if most of the product requires use of an internet connection.
Working from the full user manual gives you no more confidence. Section 4 insists you should chose the “Installer photoGPS” button of the installation screen. No such button exists and you will need to guess your way through the options to complete the installation.
The software licence is long and couched in legalese with plenty of mutatis mutandis and other impenetrable jargon, which most users will be ill qualified to judge on what they are committing themselves to, when they press accept. It all looks reasonable (don’t try and reverse engineer the product etc), except for the apparent rights of the Ordnance Survey (in section 13.2) to demand to know the use UK users are making of the product. This stuff ought to be much, much easier to understand.
One piece of poor system design is evident. The photoGPS package makes use of Phil Harvey’s excellent freeware ExifTool. However photoGPS seems to have bound version 7.33 of ExifTool into itself as it makes no attempt to recognise that a later version might already exist on the target machine (I am using v7.86). I understand that this can be difficult to detect since ExifTool doesn’t make any Windows registry entries but conventionally it is installed in C:\Windows and a presence-check could easily be made there or a dialogue with the user to browse to the location. I now have two versions on my machine (although to be fair, they do not interfere with each other).
I haven’t tried any of this with a Mac, so it may all work brilliantly.
Plugging in and starting up
===========================
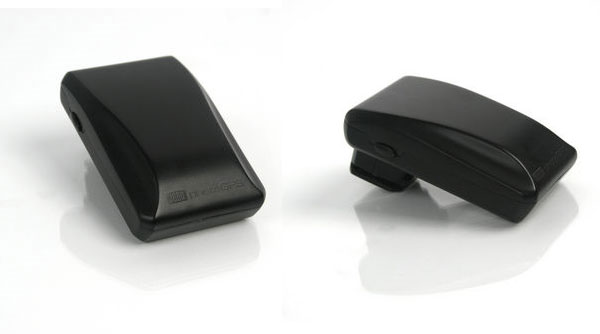
The microUSB port is located on the middle left hand side of the unit and is covered by a 10mm square rubber cover, which I confidently predict will be the first thing to be lost, either because it will fall off during normal use (it fits snugly, but not tightly over the port) or you will put it down when making data transfers and lose it. This could do with being attached.
Once plugged in to the USB drive, the unit begins to charge and as the guide states, takes a little under two hours for one of the two LEDs to glow green, indicating a full charge. The other will flash or glow red, depending on other conditions and these two together provide all the status feedback you’re going to get from the device. The indications are explained in a table in the Troubleshooting section (5) of the Quick Start guide and in colour, but not in much more detail in version 1.3 of the full manual (section 18). Whilst the interface may be rudimentary, it does keep the manufacturing cost down.
Configuration of the device requires you to start the software and set it up for first time use. This takes c 30 seconds to load first time on a reasonably well spec’d and recently patched Windows XP machine. This would also be the ideal time to register the serial number online but Jobo seems not yet interested enough in its customers to want to know who they might be – this is a shame as I’m sure I’ll want to get software updates from time to time as the current deficiencies are rectified.
The photoGPS software detects that the device is connected and a simple “push button” on the PC screen interface allows you to set the device time. This only uses the GPS satellites’ UTC setting, rather than your local Time Zone but apart from that is straightforward.
You’re now ready to use the device for real.
On camera
=========
The photoGPS device connects to the hot shoe of your camera (mine’s a Canon) and uses a detatchable adaptor to allow this. It seems that these adaptors are being made for different types of hot shoe as revenue comes in from sales to fund product improvements. For instance, the standard adaptor does not work with Sony hot shoes, but one is about to be released. The connection between the product and the camera does not inspire confidence. It does fit and work, but it is neither snug nor tight. The standard adaptor is easily disturbed, although I never actually knocked it off and I found myself pushing it back into place from time to time. I think this is an area where improvement is required, along the lines of the locking mechanism of the modern Speedlite flash units.
Although you might now think about setting your camera clock precisely (I did it against a radio clock), this step is unneccesary since the unit works by matching time intervals, rather than relying on a synchronised pair of clocks. However, setting the camera time is good practice, because both the logged locations data and the image times are shown side-by-side in the PC screen interface and it is strangely satisfying to watch the system select the right location for the right image ! (Sad, or what ?)
Each time you press the shutter, the unit will make a location determination and indicate a good point by the flash of the green LED on the right rear of the unit. However you could miss this indication, as your eye might still be at the view finder. You can configure the device to leave a time gap between the shutter press and the location logging to give you time to look at it and in case your camera produces “elctronic noise” at shutter press, which might disrupt the GPS signal reception. I set mine to a 1 sec delay and lied to the camera about the time by making it one second fast, to keep the times apparently sycnhronised and to let me check a good location signal.
The device needs to have a good view overhead to receive a strong signal. In practice and in southern England, I was able to use the system in portrait mode (with the device on its side) and inside relatively flimsy structures (an aircraft hangar) with no noticeable signal degradation. In case you are going to enter a more substantial structure, such as a tower block, a small button on the right of the unit allows you to make a
“geo-hint” by pressing it before and after entry. Subsequent processing on your computer will allow the device to make a best guess from these hints.
The manual states that the device can hold around 1000 GPS data captures before it needs to be purged (an option in the software) to make room for more.
Position capture
================
The manual also claims an accuracy of +/- 10m, being the resolution of the civilian use GPS signal. Sadly, this was one of the weakest areas of system performance, with errors of greater than 30 metres recorded around Gloucester Catherdral (in an urban setting) and of a similar magnitude in a rural area near London Colney (Hertfordshire), both over a sunny weekend. I would expect errors to be larger in poor weather but perhaps you’d keep your camera in its bag under such conditions.
Now 30 metres in position doesn’t sound much, when the Earth offers us over 200 x 10^18 sq metres of land surface to choose from, but it is easily noticable when plotted against Google Earth. The errors weren’t systematic either, so this is partly due to the US Government’s restrictions, as much as Jobo’s device. However I found a significant number of points weren’t within the 10m resolution claimed in the manual and this was a major disappointment. It may be very fast to match these GPS-derived locations against the images you have taken (I was able to match around 100 in an impressive 3 and a bit minutes), but getting the wrong answer quickly doesn’t impress me.
After the shoot – reconciliation
=================================
This part is easy. Transfer the images off your camera and note where you’ve put them. Then either transfer the data points off the device into a file or read them straight from the device and match them to the images using the PC screen interface. There is also a feature in the software – for countries with mature geographical data available (this includes the UK and most of western Europe) – to associate points of interest (POIs) with the images and again, the amount and type of such data is configurable inthe PC screen interface.
I don’t know who defines these Points of Interest but they were certainly of no interest to me. I would like to see a future release of the software allow the import of a text file where I have defined named places against coordinates, which could be included in an internal database of POIs.
The system can also associate an altitude against the GPS coordinates. The device determines this from the satellite constellation at capture time. And like position, altitude variations can also be startling. For me, this varied between -14 and +27 metres on a short trip around the River Tamar (Plymouth UK), all sensibly at 0m so these too, like the ground position need to be treated with a degree of caution.
I’ve only used this with .jpeg images. The manual says it’ll work with RAW as well and generate an XML based sidecar file.
Product support
===============
An email query about the lack of a Section 6 in the quick start guide was answered efficiently, politely and above all, helpfully with an email attachment of the full manual. This promises great things if the rest of the company can react like this.
Price
=====
Retailing in the UK at around GBP 170, it is possible to find them for sale at around GBP 110. I’m glad I didn’t pay GBP 170 for mine but I wish I had been able to hire it for a weekend before I had commited.
Conclusion
==========
The Jobo photoGPS is yet another example of a great idea that falls short of expectation in the flesh. It’s a small (68mm x 43mm x 35mm inc adaptor), really neat, light (80 grm) and well made device that doesn’t quite stay secured to the hot shoe. If you have hundreds of images or no idea where you are or where you’ve been it does a workmanlike job of recording almost where you were – but then again if you had so little clue in the first place, should you really be out on your own ?
There is so much potential to improve this product:
- make it fit tightly to the hot shoe
- make it available to more hot shoe types
- sort out the accuracy (perhaps the upcoming European Galileo constellation will make this easier)
- work out how the firmware could be updated
- allow customisable POIs from a user defined file
that it remains an exciting gadget with promise of better to come.
However, today, 6/10 and I’m disappointed. I hope Jobo might take up some of these suggestions and improve it. You should really consider whether you are better off today, using the Geosetter or ExifTool shareware, given the amount of tweaking I find necessary to make the metadata match reality.
I find this GPS geotagging divice attractive for a number of reasons:
1) It tracks whenever the camera shutter is fired, and thus will not diliver too much information.
2) It’s very easy to use – both the divice and the software.
3( It’s nicely made – and unlike some other users – mine doesn’t fall off the camera at all.
3) I had no issues concerning the camera clock setting or time-zone setting, like I have with my two other GPS tracers.
4) I made small tests, photographing in my neighbourhood. All images got located close to spot on.
I had some trouble thoug. When altering the location information and re-tagging, using the software, it seemed to me that the software tagged the images with the original location again. Not the ones I put in myself.
I can recommend this for photographers, who want to easily goetag their images, without a lot of hazzle.
regards
Jens Bladt, photographer, Denmark
I am not familiar with JOBO,but I used to use Nikon GP-1 for last whole yea, and now using easytagger. You know, I am keen on shooting, every time I go wild, I would shoot more than 1, 000 a day. The GP-1 often uses out the power of my camera for it has no independent battery. That drives me mad. Later, my friend recommended Easytagger, which has its own battery and work more than 10h. And it can get power from camera when it itself exhausted. No need to set up, quite convenient. Moreover, it build-in a 2G memory card which can save room for my camera. The best I love is that Easytagger can record my route on trip, which enable me see my trace on may with my photos. It’s fantastic! My daughter is getting more and more interested in photographer now, haha. It’s quite funny!
I am using a GPS geotagger with my D300 now, it is called easytagger. Every time I go out for a hike or a vocation, I carry them with me which help recording each exciting and memorable moment. The easytagger records all the geography position accurately latitude, longitude, press altitude, barometric, heading and UTM time metadata to its 2 G SD card. Further more, the EasyTagger will also track the route that I walked, plotting it along with the photos. This allows me to retrace my steps and share my photos in a more meaningful way. Moreover, they add a bracket to its accessory list this month which to solve the problem on the hotshoe. It is quite a tiny and useful item; now the hotshoe can work really well. The company now supply the bracket and a magic sticker that work with them for free. That’s fantastic! I like manufactures who develops continuously to meet customers requires.
Easytagger can work with any camera, which includes point-and-shoot digital cameras as well as DSLRs from ANY manufacturer: Canon, Casio, Nikon, Olympus, Panasonic, Pentax, Sony and other.
You can check their website to learn more information by yourself. http://www.e-geotag.com/
Can the bracket work with my GP-1? Where could I buy the bracket? Order on their website?