
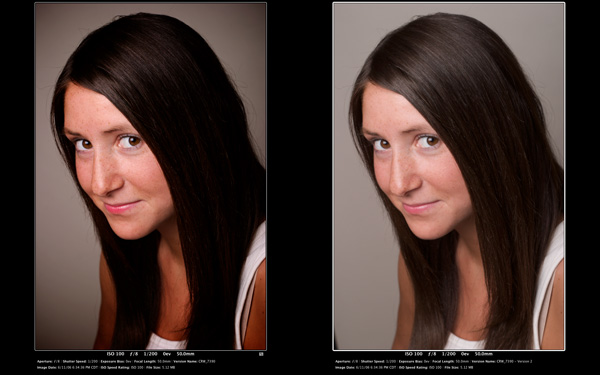
New vignetter/de-vignette tools as well as a vibrancy adjustment are amongst many tools allowing more creative options without needing to move to an external editor and prevent wasting HD space on a duplicate file. Right image is the master file, left image is the adjusted version.
Seven days ago, Apple released Aperture 2.0. Over the same seven days I have put several projects through it, timed it, and tried to grasp its new features and changes.
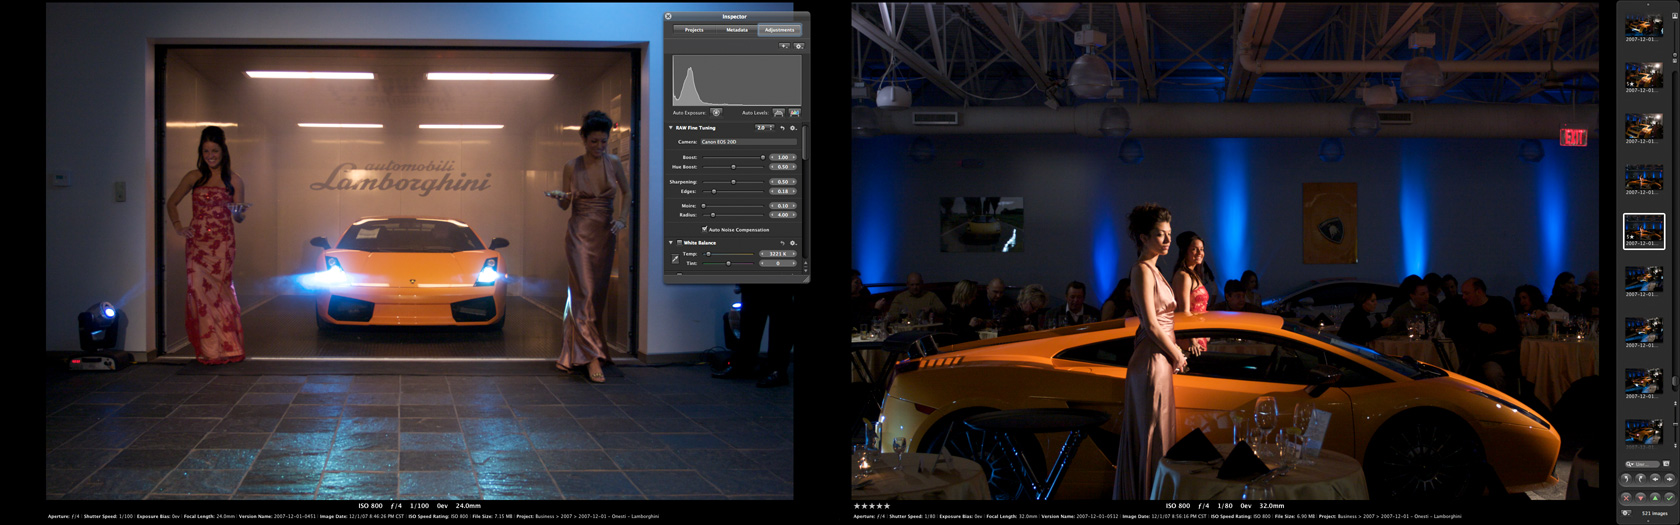
Aperture 2.0 full-screen mode across 2 monitors. Notice the new tabbed inspector providing the ability to switch projects and adjust metadata without switching display modes.
Speed
First and foremost Apple touts the new version’s speed. After having spent a week with it, I have to admit it’s justified. I should mention up front that I am not playing with a small library of a few projects,I am basing all my findings on my live library of just more than 100,000 images. It’s safe to assume the performance won’t be any worse on a smaller library. AP2 seemed to perform pretty much the same with 100k files as it does with the 30 or so I played with before converting my library.
NOTE: The conversion is a one-way process, make sure to back up your library before you convert to 2.0′s new format.
The very first encounter with Aperture 2.0 for photographers will be either importing new projects or converting their existing 1.5.x library. Importing fresh files is incredibly fast. Images are imported in the background, much like they were in 1.5.x, but AP2 displays the JPG previews for the RAW files immediately, making it possible to immediately display and pick images. And due to the re-engineered database backbone of the entire system, changes can be made while importing without bringing the whole system to a halt. The only indicator that a project has finished importing will likely be slightly faster response when browsing and selecting files. That is if the indicator window that usually communicates that notification is disabled.
If you’re converting your existing library and are worried about the time it will take, rest easy. Mine took under an hour. I wish I had a more accurate number, but I left the system alone after beginning the process. I came back in an hour to find it finished.
As a stress-test I loaded all of my images. I clicked on the “All Photos” field under “Library.” About 15 seconds later the screen showed thumbnails, and on the bottom the status read “102,751 images displayed.” I hit “L” to start jogging through the files and let it go for 3 or 4 minutes. The entire time, through thousands of files, the scrolling kept up with no lag, no beach balls, no thrashing of the hard drive. I was impressed at this point, but one feature that won me over even more: Quick Preview.
Quick Preview foregoes the decoding of the RAW data and any adjustments that you have made to give you the quickest possible preview of a file that it can. In practice, scrolling speed is often more important than viewing a fully tweaked image, and although in AP2 the previewing of adjusted images is very fast, sometimes you need faster. At that point I hit “P” and am pretty much limited only by my ability to quickly recognize images. The preview speed almost approaches that of Photo Mechanic.
And finally, straightening images: it’s like butter. If you have ever straightened inside Aperture you understand the significance of that statement. Other functions, such as shadow/highlight adjustments also are much more responsive.
However, be warned that throwing a lot of adjustments on an image does slow down some functions. An image with many brush strokes (brush strokes?) and other adjustments will lag a little when performing some functions, since data is generated on the fly. Hopefully the performance will improve with point releases.
Converting RAW files to the new rendering engine is also time consuming. Migrating 30,000 of my RAW images took under 15 hours. It took longer to generate thumbnails to reflect the changes in rendering, but I don’t count that as it’s a background function and has minimal impact on overall performance. Even exporting has finally become a background function, allowing the work to continue. Exporting also takes much less time than it used to.
Capacity
I found out the hard way that Aperture 1.5.x had some limitations in image capacity. I recently hit the 100k file mark and all smart albums and web galleries that queried the entire library ceased functioning. Apparently there is a limit in the amount of images that can be displayed. Nothing official was ever said, but Apple touts AP2 as being able to handle display of more than 100 thousand images, implying that 1.0 had a limit of that number. Projects are now capped at 100k images. The library has no official limit, but Apple expressly states that performance even at 500k images in the library should be in the same league as a small library.
Workflow
Everyone has a unique workflow, and I won’t be so bold as to suggest that the new version of Aperture improves things or makes them worse. Changes have been made in specific response to key concerns that photographers have voiced over the years. Number one on my list is a shortcut to jump to the next image while keeping the selected metadata field active. This is a huge boost in productivity for anyone that needs to uniquely caption a lot of images. Other improvements, including speed, also help to streamline the flow. I’d even say that the ability to hide the inspector in exchange for a full screen of thumbnails helps me work more efficiently. Being able to change the entire screen to the viewer will help those who only have one monitor to work with. AP2 includes a clever interface for tweaking keyboard shortcuts, allowing anyone to change the interface to reflect the way they prefer to work.
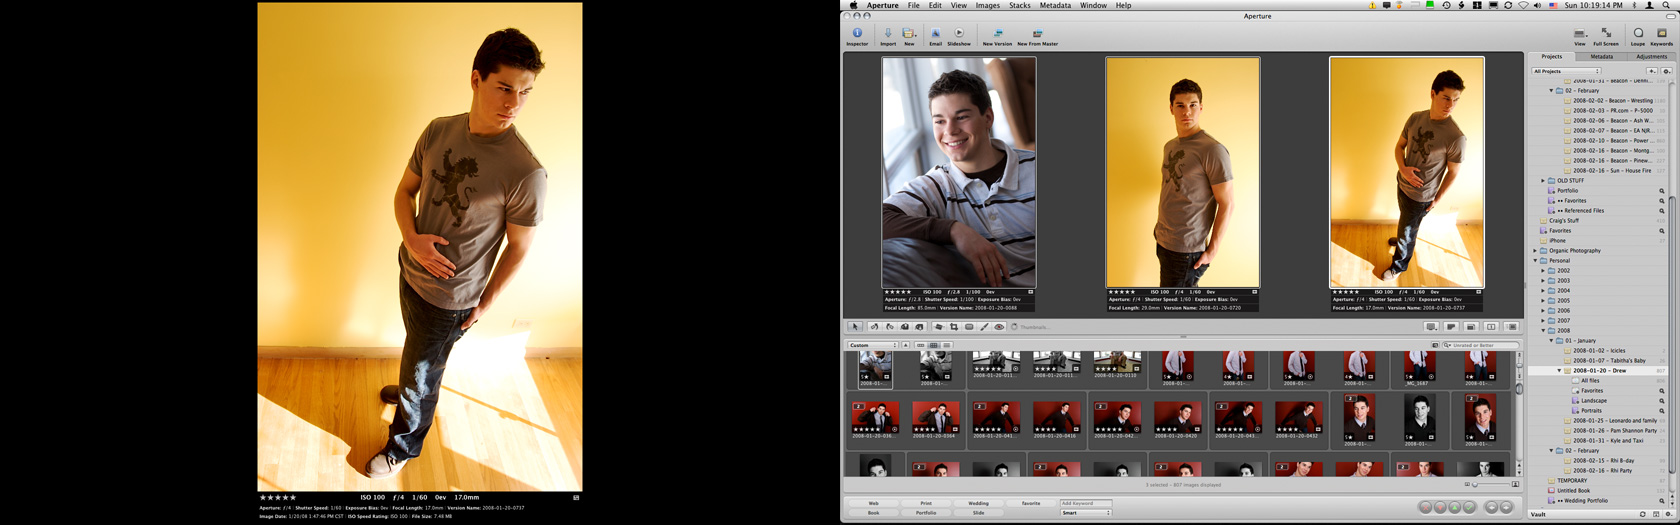
The new inspector (right side of right screen) sits on one side of the screen, negating the need for two open panes, and can be hidden entirely.
Image Quality
One of the key benefits of shooting RAW is the ability to choose your favorite conversion engine. This is one of the areas where Apple’s approach to RAW truly sets them apart form the competition. Aperture 2.0 has a new rendering engine, the third revision to the rendering code in the life of the program. But the switch is entirely optional. This has huge implications for the future, as an image that was meticulously adjusted will not be changed without the owner deciding to do so.
The new engine does improve on several shortcomings of the previous versions when it comes to rendering. I should say version, as the initial rendering engine was a rushed mess and was quickly replaced with a 1.1 version, so that’s the one I count. I always preferred 1.1 over all the other software I’ve used (I’ve hated ACR’s rendering since day one, though I liked PhaseOne) even though it rendered imagesdarker and more contrasty than I prefer. It was easy enough to tweak, but I welcome the more neutral way AP2 renders the files. At the same time, noise seems to be better controlled and there is noticeably more detail pulled from the files. The changes are usually subtle, until you hit an image with a lot of yellow in it and you notice that the old engine tended to overdo the yellows in the highlights. I never really noticed it, but 1.1 really did ender files much warmer than it probably should have. Once again, if you prefer the old look for some images, you have the option of keeping it that way indefinitely. As a safeguard against complaints about being slow to support new RAW formats, Apple also included support for baseline DNG. Converted files should open now even if the camera’s format is not yet supported.
Adjustments
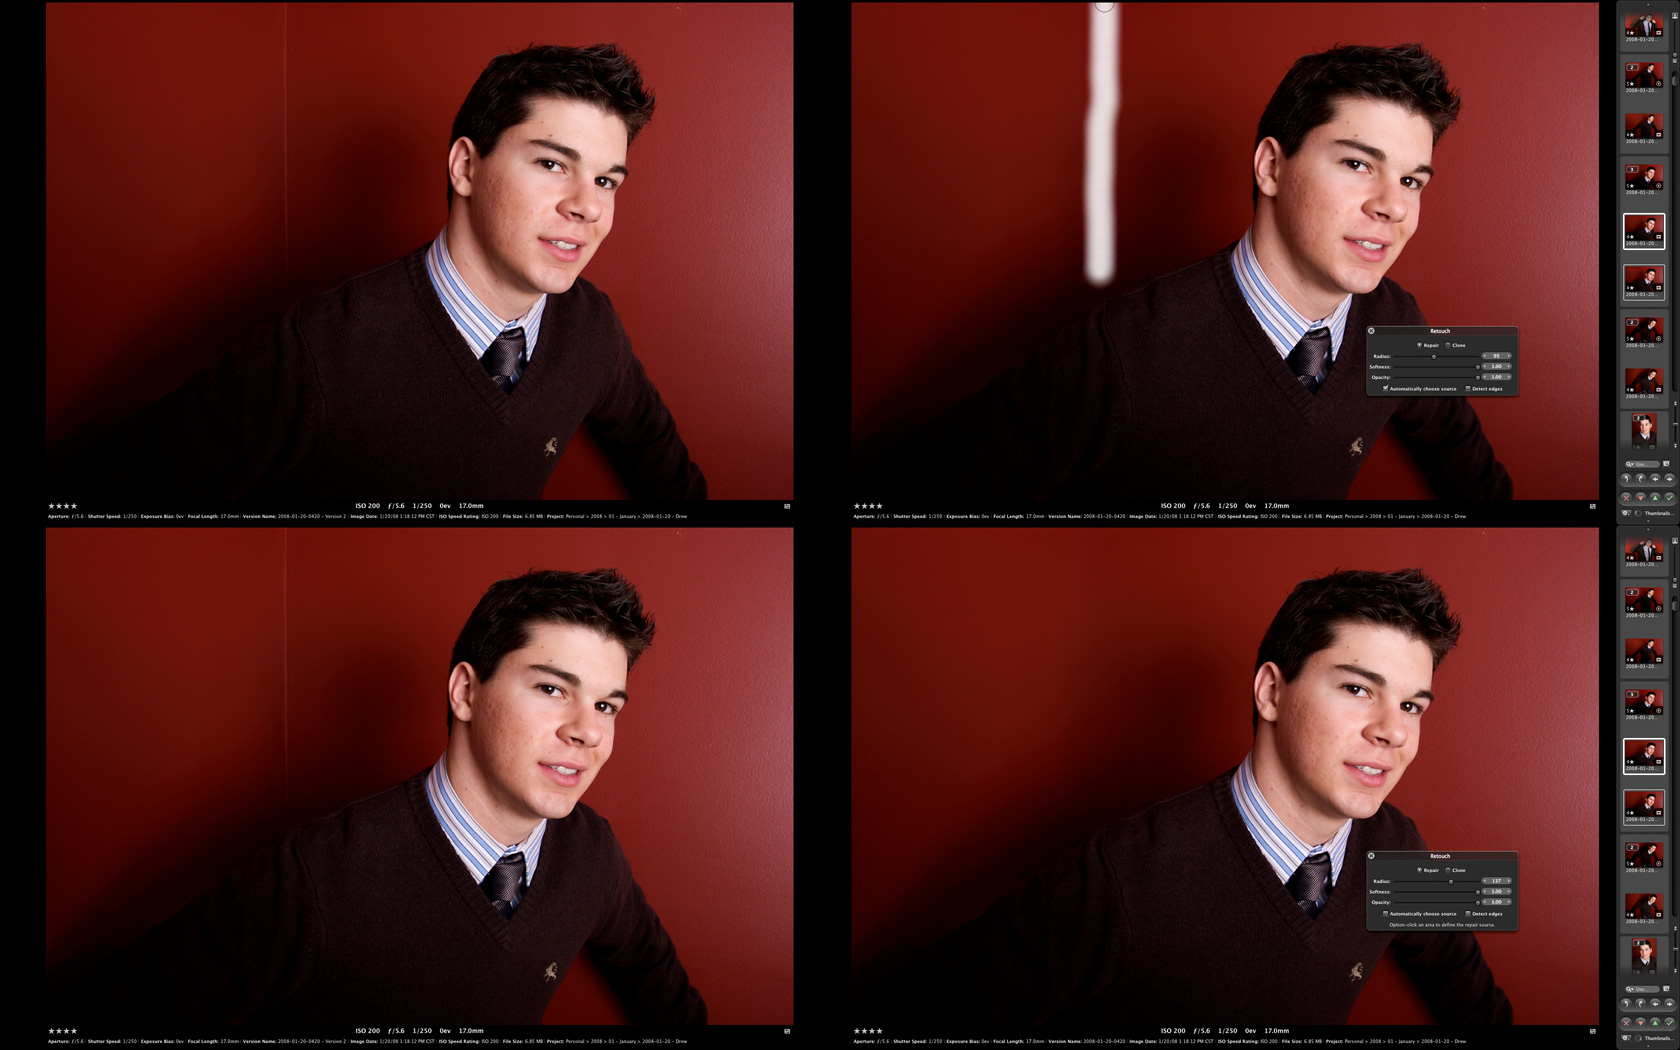
Left side is the master image, right side is the modified image. Top shows the stroke being applied, bottom shows result. No new files, totally non-destructive.
Adjustments stay largely the same, but the few new additions are very welcome. Vibrancy and localized contrast (AP2 calls it “definition”) replace what used to take many steps using other tools. Vignette/de-vignette tools allow for finely controlled creative effects or make up for shortcomings of lens designs. The two headliners in this category are the Retouch Brush and the plug-in API. AP2′s Retouch Brush is essentially a non-destructive version of Photoshop’s healing brush. Strokes are stored in the database and can be deleted at any point. I wish one could choose a stroke to eliminate, since now I can only go back step by step linearly. Being able to jump in and delete just stroke 2 out of 3 would be a great workflow enhancement. The plug-in API has huge implications. Nothing has officially been said yet, but it’s obvious that image manipulation can now be handled by plug-ins. Noise Ninja inside Aperture? YES PLEASE.
The addition of the retouch tool has eliminated most trips to an external editor from my workflow. That, plus the potential for plug-in manipulation filters, really open up possibilities for powerful non-destructive operations that don’t break your workflow by requiring you to switch apps.
Presentation

Support for .Mac galleries bring password protection, impressive presentation and ability for others to upload and share files.
One of Aperture’s greatest strengths has always been its excellent book designer. In 2.0 Apple improved it by allowing you to create custom sized books, which when exported as PDFs, can be sent to any supporting print house. I have used Sharedink.com for books designed with Aperture and the results have been excellent.
On the web front, Aperture finally supports the excellent web galleries introduced with iLife 08. The downside is that they require a .Mac account, primarily because of their interactive nature. Access to the galleries is entirely controlled by the photographer. Password protection can keep the images private and options include the ability to allow downloads of individual images (including RAW), the ability for others to upload images to the gallery and the ability to email images to be added. Each option can be toggled on and off, even after publication. Any images others upload are synced back into your library, making sharing between friends and family seamless. As a bonus, these galleries detect when an iPhone or iPod Touch is used for browsing and reformat the interface for the smaller displays.
Conclusion
It’s obvious that Apple listened to complaints and improved the product across the board. There’s no arguing that it took a long time to get here, but if rumors about the first release being rushed are true then Joe Shorr’s team had a lot of work to improve on the original. The dramatic difference between 2.0 and 1.5.6 really does seem like we’re dealing with two different products, thankfully things are getting dramatically better rather than worse. If you’re an Aperture user and are contemplating the upgrade, nothing should stop you. The $100 price reduction from the previous version makes it that much sweeter for those that haven’t taken the plunge yet. Competition is a wonderful thing.
Aperture 2.0 costs $199.00 new or $99.00 for the upgrade. A 30-day trial is available.
We welcome your contacting us to obtain further information and editorial version of our new Tiffen Dfx plug-in for Aperture 2.1
I would like to know which adjustments were made on the first picture of this article (http://www.photographyreview.com/reviews/files/2008/02/ap2-vignette.jpg). I don’t use to change my photos but I realized there’s a way to make the picture better… more colerfull and I don’t want to use Photoshop, just a simple way to do that.
Thiago,
The only changes made were a contrast increase (higher contrast increases saturation a little) and the addition of vignette.
Hope that helps.
-Seb
i have problems with uploading edited photos from aperture to facebook. the edited versions are not uploaded and the file will only show the master version. you can’t select the edited photo in facebook so there’s no choice but to upload the master version.
i also encountered that when master and edited versions were displayed in facebook and i selected the edited versions, facebook did not upload any photo at all.
please help.